Getting Started
Quick Start (Live Demo)
The fastest way to try Gridfinity Builder is the live demo:
No installation is required. Use a browser with WebAssembly, Web Workers, and WebGL 2; see browser requirements.
Local Development
Prerequisites
- Node.js 24, matching CI and Docker builds
- The npm version bundled with Node.js 24
Install & Run
git clone https://github.com/tunelko/gridfinity-BambuLab-3D.git
cd gridfinity-BambuLab-3D
npm ci
npm run dev
Open http://localhost:5173 in your browser.
Production Build
npm run build
npm run preview
The built files will be in the dist/ directory, ready to serve with any static file server.
Your First Layout
- Choose a baseplate — Select a printer preset (e.g., Bambu Lab A1) or set custom grid dimensions
- Add bins — Click a bin preset or the "+ Place 1x1 Bin" button, then click on the grid to place
- Configure — Click a bin to select it, then adjust parameters in the configurator panel
- Preview in 3D — Switch to Split or 3D view to see your bins rendered
- Check the fit — Download Fit Test, check its dimensions in your slicer, and print the test pieces before a large layout
- Export — Click Export All for the layout or Export Bin for the selected bin
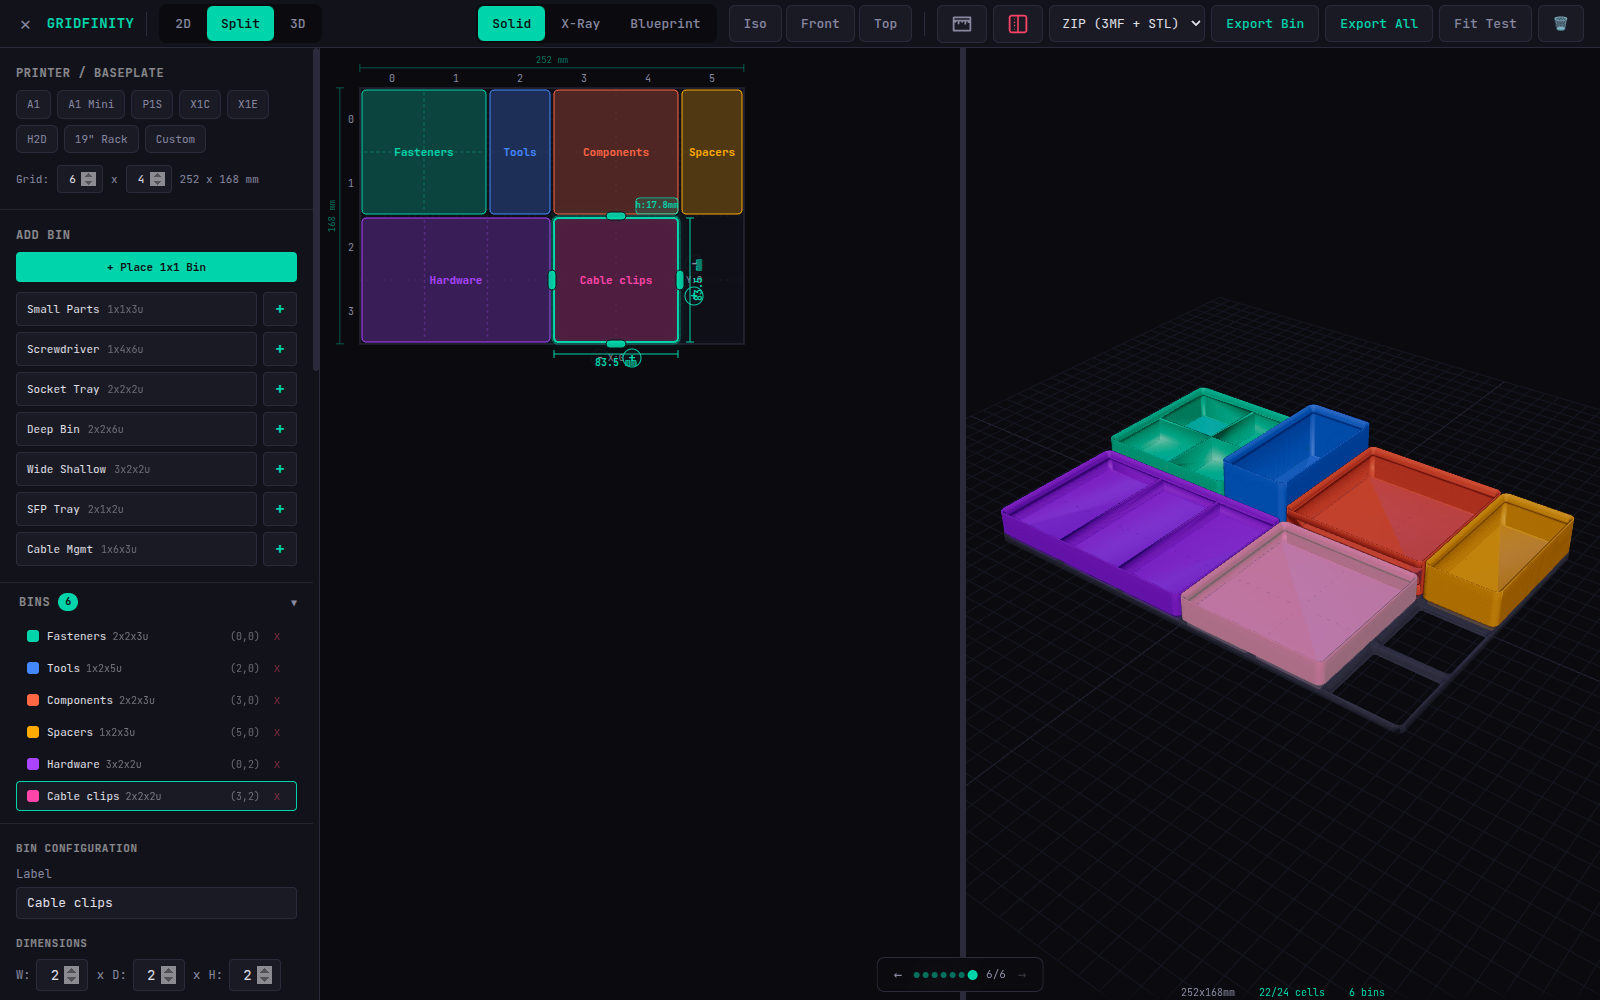
The default ZIP (3MF + STL) download includes model.3mf and one STL per part. Extract it before importing either format; choose 3MF only for a direct download. The displayed baseplate is a preview reference, not part of a normal bin export. These files contain geometry, not a configured printer profile or toolpaths. Follow the fit-test guide and export instructions.
Documentation and checks
npm test
npm run export:fit-test
npm ci --prefix docs
npm run build --prefix docs
The fit kit is written to artifacts/gridfinity-fit-test.3mf. Documentation is built in docs/.vitepress/dist/. Automated checks do not replace slicer import and physical print checks.